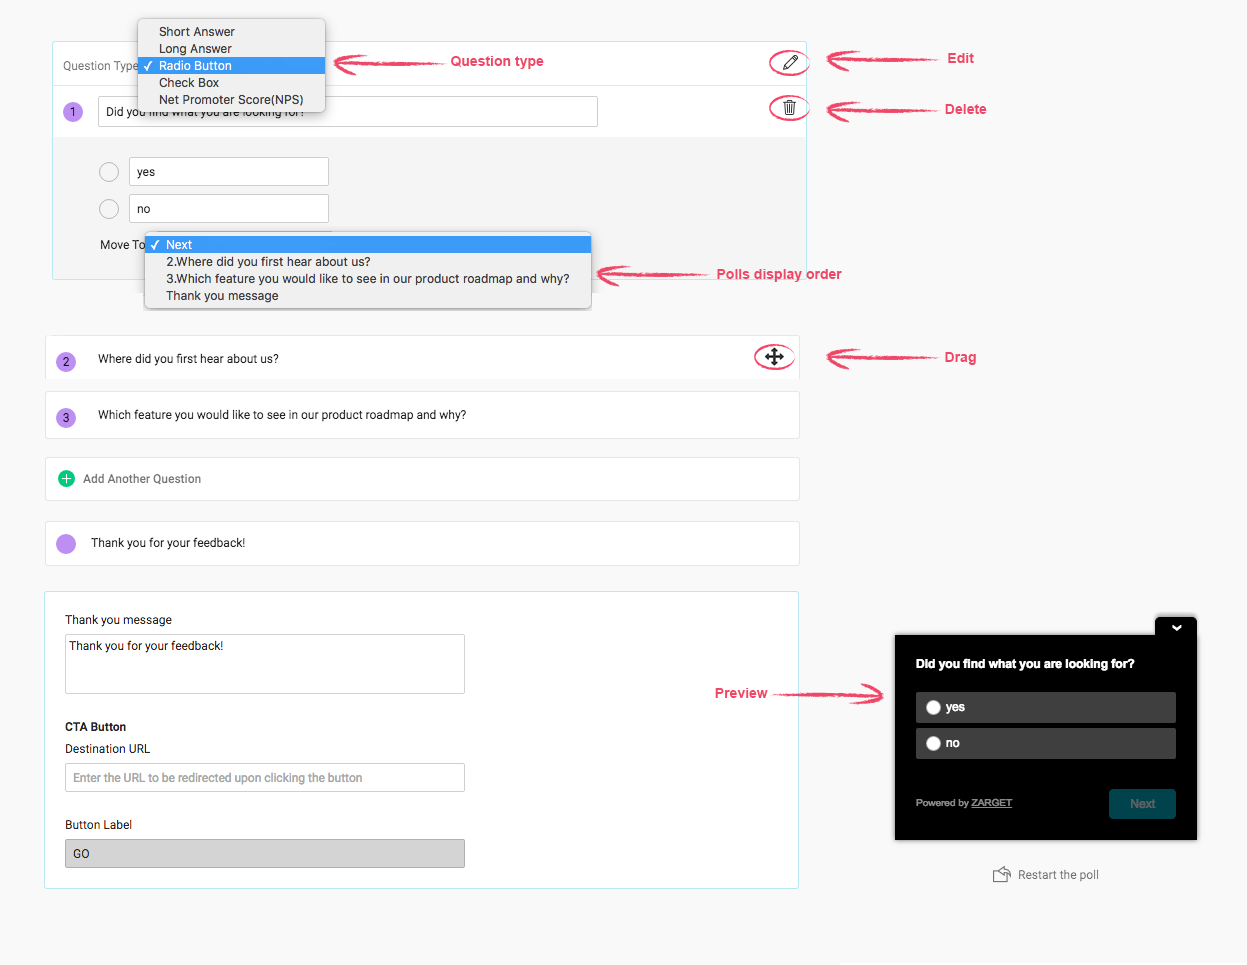
Polls Creation Window
To add questions, click on Add another step.
Question Types
Freshmarketer allows you to use the following question types:
- Short answer
- Long answer
- Radio button
- Checkbox
- Net Promoter Score (NPS)
Short answer
Short answer type will allow respondents to give the short answer of about a line length. The allowed character length for the visitor to answer is 150.
Long answer
Long answer type allows respondents to type answers that range from a line to multiple lines. The allowed character length for a user to answer this type of question is 300.
Radio Button
Radio button question type allows respondents to select one option from a list of options. In other words, yes or no questions are of this type.
Checkbox
Checkbox question type allows respondents to select multiple options for a single question.
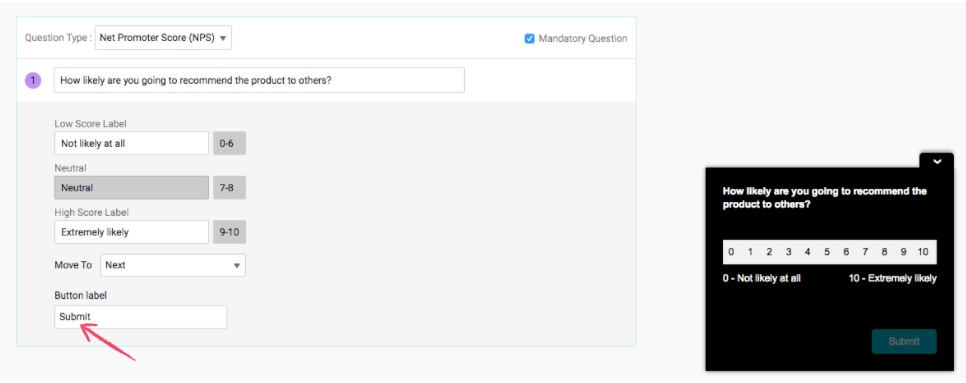
Net Promoter Score (NPS)
Net Promoter Score (NPS) question type helps you to analyze how likely your visitors recommend to others. The scoring for this type of question is mostly based on a 0 to 10 scale. Respondents are bucketed based on the scores as promoters, passives, and detractors.
Read this article to know more about poll question types and their reports.
Thank You Message
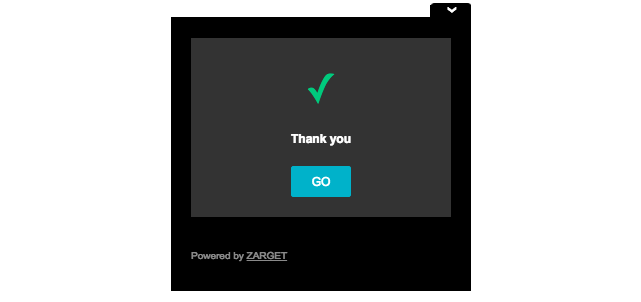
Thank you Message in Polls
Freshmarketer allows you to customize a thank you message. This message will be displayed to your respondents, upon submitting the answer to the last question in the poll.

Customize Thank you message
Destination URL
The destination URL allows a user to redirect to a page, post submission of the poll on your web page. Enter the URL of the page you wish your users to visit as a value in the destination URL section.
Example
Assume ECart is an e-commerce site and runs a poll on the homepage. ECart has decided to provide an exclusive offer for all the respondents of the poll.
To satisfy such requirements, Freshmarketer provides an option to provide the URL of a webpage or site in the destination URL section. Now, the respondents of ECart’s poll can be redirected to the offer page by clicking on the CTA subjected to the thank you poll widget.
Once the creation of polls is completed, click on the Next button at the top right corner of the page.
A Configure page opens to customize and personalize poll widget. This page allows you to do the following:
- Setting themes for poll
- Positioning poll
- Behavior setting for poll
- Device specific targeting
- Setting traffic for poll
- Poll end scheduler
Click on the Next button at the top-right corner to save your setting.
Read this article to know more about each of these options available in Freshmarketer’s poll widget.
In Freshmarketer, device-based targeting for polls is configured in the Configure tab. To provide URL targeting for the poll, follow the below steps:
Enter the URL of the page for which the poll should appear. To change the URL match type, click on the drop-down menu.
Read the following articles to know more about URL targeting match types
URL Targeting Explained
How to track a set of pages using Regex
Advanced option
Exclude URLs - Mention the URLs of the page(s) to be excluded from your poll.
To launch the poll for the specified URL(s), click on the Publish button. The poll will be launched and the reports and responses will be generated upon data collection.
Read this article to know more about poll reports.
Other options
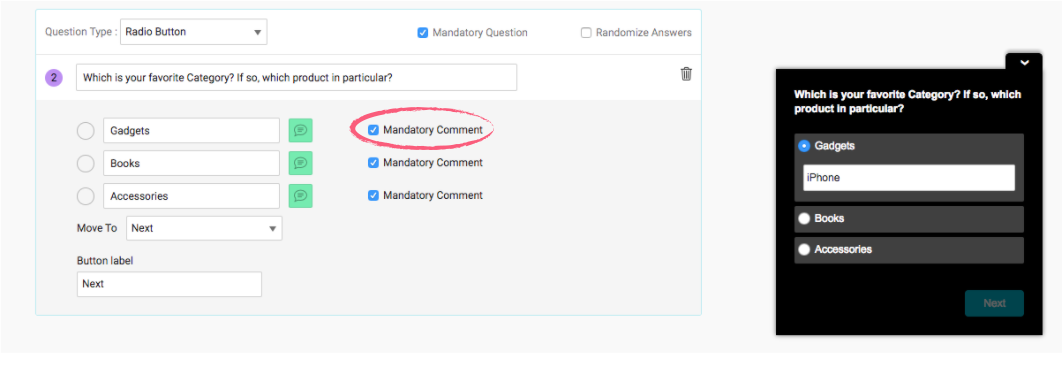
Now, you can customize the name of the Next button with the help of the Button label option available for all question types.
n Radio Button and Checkbox question types, you can now add a textbox for all the options to get a mandatory response from the user with the help of Mandatory Comment option.
Click the comment icon and check the Mandatory Comment checkbox to enable this option. The below-given screenshot explains how the poll looks after enabling Mandatory Comment option