In addition to A/B Testing, Freshmarketer has another important feature - Split URL Test
Why need a split URL testing when you already have A/B testing?
Split URL comes in handy when,
- The variations are far different and complex from one another
- Multiple variations of the page are already available and you need to create an A/B test with these variations.
This article explains about setting up a Split URL test in Freshmarketer.
Split URL test can be created in two ways:
1) Using Chrome extension
2) Using Freshmarketer’s web app
Using Chrome extension
Enter the URL of the webpage to be tested in Chrome browser. Click on the Chrome Extension and select Split URL.
Using Freshmaketer’s web app
Log into Freshmarketer and in the Dashboard page, select Split URL either from the left side panel or from New Experiment.

Split URL in Freshmarketer Dashboard
The Split URL page opens. Provide an Experiment Name and hypothesis for your easy reference.
Enter the URL of your original page in the Original section. This will be used as the control for the experiment.
The drop down provides two options:
1.Simple Match- To run a regular split URL test.
2.Pattern Match- To use the RegEx functionality.
Enter the URL of the other page you would like to experiment in Variation 1 section. You can also edit the name of the variation by entering an appropriate name for your reference.
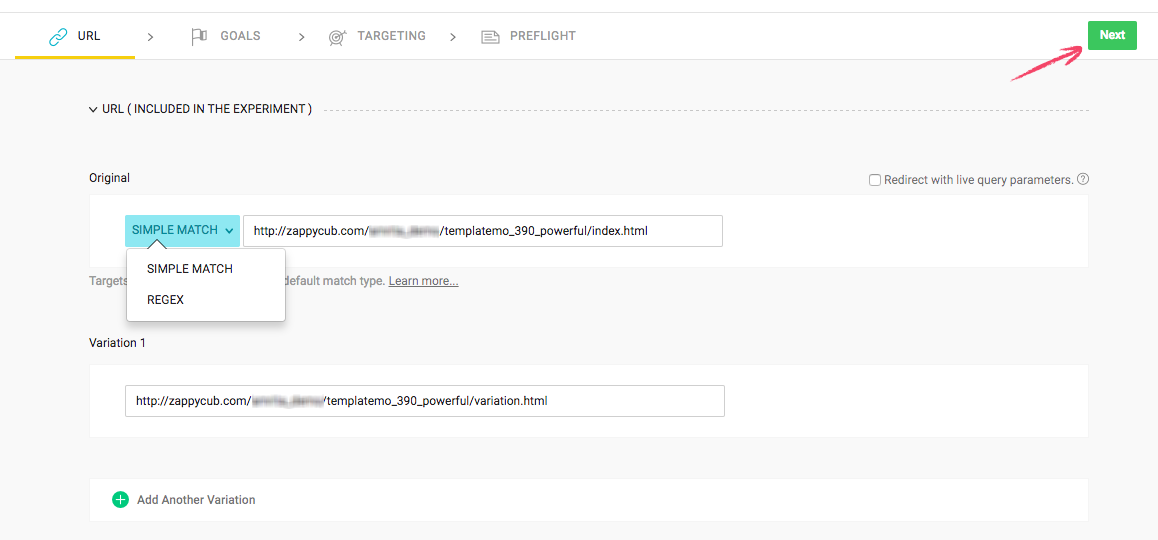
Split URL: URL Tab
NOTE:
1.You can test multiple pages by clicking on

Add Another Variation
- Click on ‘Redirected with live query parameters included’ if you want to pass the query parameters of your original URL to the URLs being experimented with. Read more
Once you have entered the URLs to be tested, click on Next button in the top right corner of the page.
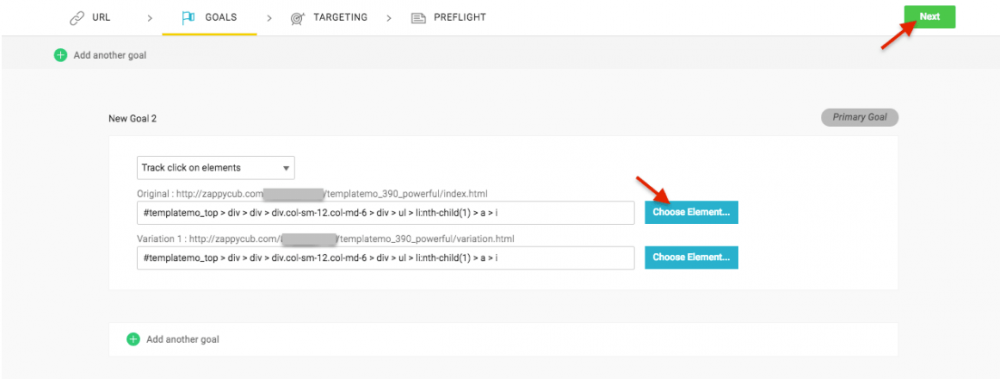
The control goes to the Goals page. Click on the ‘⨁’ button on the left to create a new goal. Select a goal from the list of goals provided in the drop-down menu. The different goals are explained below:
a.Track clicks on elements- To track clicks on elements on the page such as buttons.
b.Track clicks on links- To track clicks on links in the page.
c.Track page visits- To track the visits to the particular page.
d.Track engagement- To track clicks and scrolls on the page.
e.Track Form Submits To track successful submission of forms
Split URL: Goals Tab
Once you have determined the goal type, select the links or elements in the page that are need to be tracked. Freshmarketer gives you an additional option to create custom event goal.
Set any of your goals as the ‘Primary goal’ by clicking on the button to the right side of the goal.
Once you’re done setting up the goals, click on Next button.
You can add any number of goals by following the same process. However, primary goal can be set only to one goal.
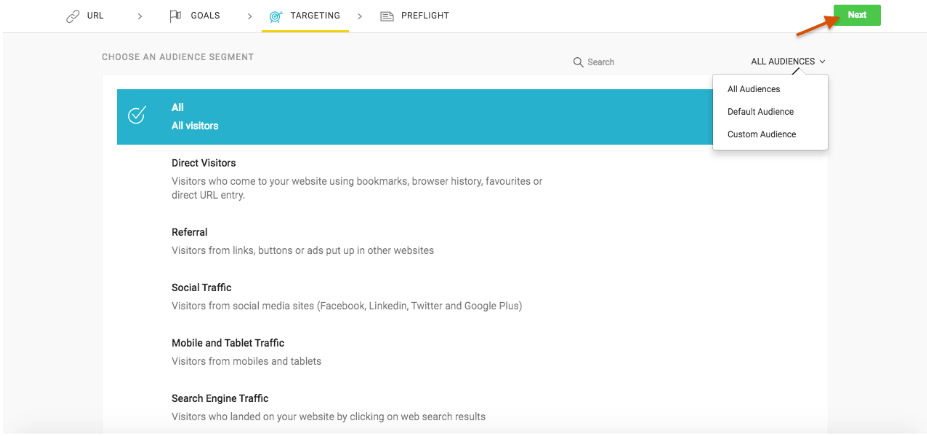
Audience segments can be of multiple types. Freshmarketer gives you a choice to choose your audience segment from one of the three categories- All, default and custom.
Split URL: Targeting Tab
If your requirement doesn’t match any of the audiences, then click on Custom Audience option.
Then, click on Next button to go to the next tab- ‘Preflight’.
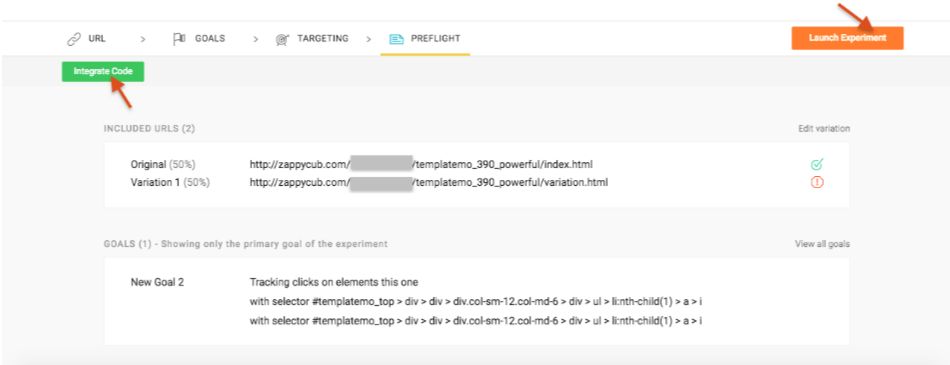
A summary of different parameters for the split URL test appears in the Preflight tab. You can always go back to the tabs and make the necessary changes. The preflight tab is blended with options such as:
- Set Traffic- You can edit the traffic to each of the pages by clicking on the Edit button, next to the traffic setting. Here’s a guide to optimize your traffic setting on the experiments.
- Edit variation- This allows you to add, delete or modify the variation page(s). Click on Edit variation option and make changes as per your requirement.
- Code Installation- To test your page(s), integrate Freshmarketer JS snippet in them. Ensure it is pasted in the part of the HTML code. Integrate code by clicking on

Integrate Code
Once the code has been embedded, verify the code by clicking on Verify
Split URL: Preflight Tab
After successful verification, click on Launch Experiment button at the top right, to start your split URL Testing experiment.
By default, we recommend a statistical significance value of 95% for any experiment. You can change it depending on your requirement.